FlexRay Automotive Bus Protocol stay OXYGEN software Configuration application in
If and only if OXYGEN When used in combination, you can use the OXYGEN obtain FlexRay Data flow:
• Vector VN7610 (1g individual FlexRay Interface )
• Hardware must pass USB Connect to the measurement system running OXYGEN. .
• except CAN - FD In addition to data collection, VN16x0 The interface can also be used for conventional acquisition of CAN - data streams (up to 1 MBaud).
• In addition, it can also be used to can Transfer data. This is an additional optional feature that requires a separate license card , For details, please refer to CAN-OUT - CAN output :.
• If you need to use the above at the same time CAN-FD and FlexRay Interface, please follow the steps below :
• Run the latest Vector _ Driver _ Setup , it can be Vector Found on the home page
• Select the driver of the corresponding hardware device and run the installation ( As shown in the figure four point four three )
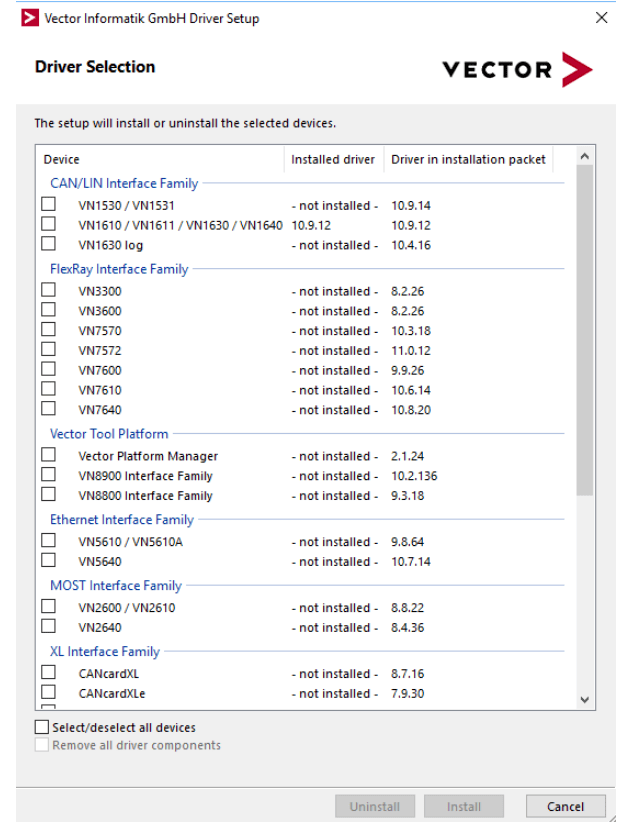
Fig. 4.43: Vector Drive Options
• After installation, connect the VECTOR equipment to the measurement system
• open OXYGEN , enter system settings DA Q Hardware, ensuring VECTOR Hardware Enabled ( reference resources DAQ Hardware )
be careful : If the VECTOR option is red ( As shown in the figure four point four five ), The current software activation status does not support CAN-FD ( As shown in the figure four point four five ). Please contact our support team
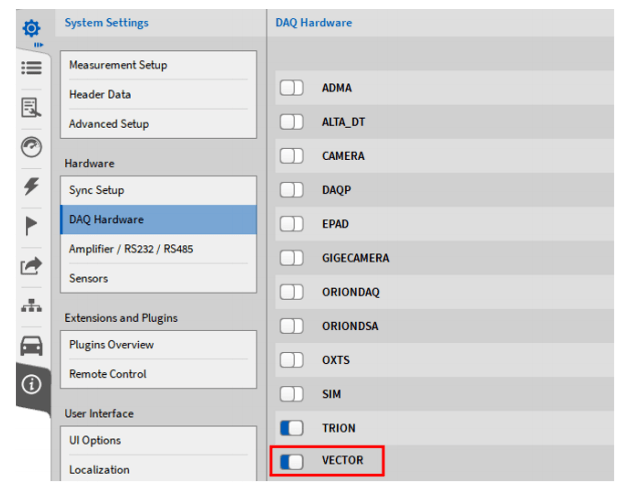
Fig. 4.44: Activate CAN-FD
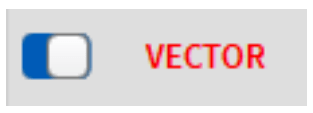
Fig. 4.45: No CAN-FD corresponding activation
• To change the settings in this menu, you need to restart the software
Note: If the connection between the Vector hardware device and the measurement system fails during operation (that is, the USB cable is unplugged), You must restart OXYGEN and CAN-FD data collection after solving the connection problem.
4.7.2 Flexray Channel settings
• open OXYGEN Channel list . The Vector The hardware channel will be VNxxxx Visible in the channel list ( chart four point five one ).

Fig. 4.51: The channel list contains VN series hardware
• Click the gear shape button to enter the channel setting ( Blue mark chart four point five one ). Click the load button to locate the correct configuration file ( As shown in the figure . 4.52 ).
• The documentation must be compatible fibex 2.0 reach 4.1.2 Description document standard (ASAMMCD-2 NET)
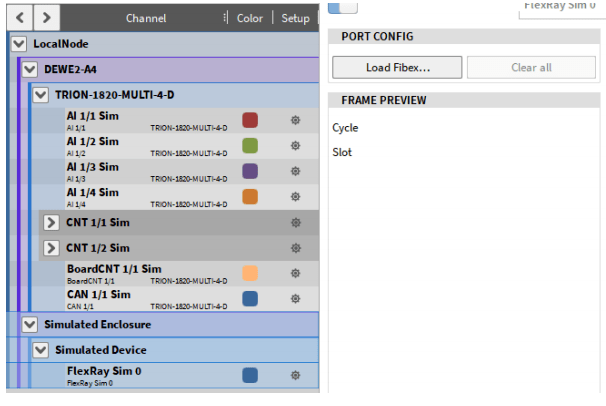
Fig. 4.52: FlexRay Channel settings
• After loading the Flexray configuration, a channel selection dialog box pops up ( As shown in the figure four point five three ) Will be opened from febix In format file Select the channel to be decoded during data acquisition. You can select only some channels and messages, or you can select all channels.
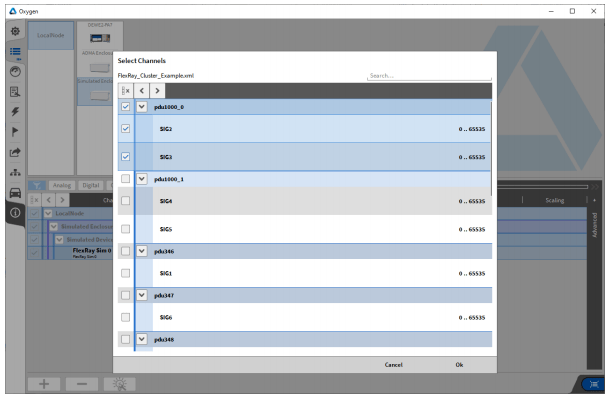
Fig. 4.53: Peer Selection Dialog
To select additional channels later, simply reload fibex File and select more Channel. Clear All( Figure 4.52 )Button to delete the current channel selection. After loading the fibex file, an arrow will appear to the left of the channel name. Clicking the arrow expands the FlexRay channel column Table and displays each FlexRay message, including their channels( Figure 4.54 )。
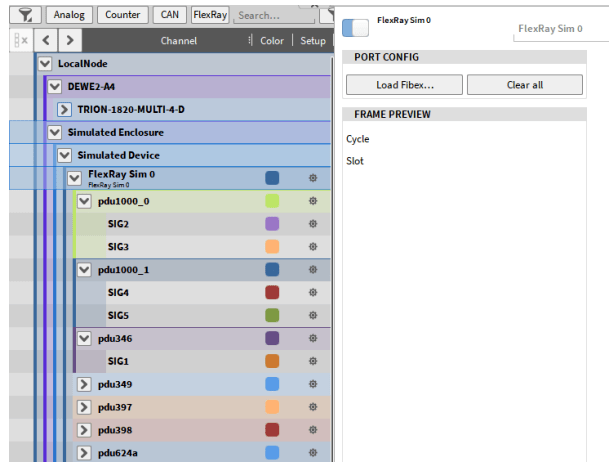
Fig. 4.54: OXYGEN List of Flexray channels in
FlexRay Offline decoding :
• During data analysis, additional channels to be decoded can be added. Therefore, open the corresponding FlexRay Port and load again fiex File. You can now select and decode more channels.
be careful : The previously recorded and decoded channels cannot be deleted from the data file.
Flexray stay OXYGEN Limitations in :
• I won't support it ARXML (AUTOSAR XML) Description file
• Multiple windows are not supported
• Automatic connection is not supported
• String channel not supported
• The scaling type of a signal according to the range is not supported


